Tag: ARC Raiders Items

Buried city hospital key in ARC Raiders

In the desolate, sand-choked world of ARC Raiders, every loot item and key holds the potential to turn the tide of survival. Among the game’s most sought-after collectibles, the Buried City Hospital Key stands out as a rare and valuable tool-one that unlocks hidden rewards, drives quest progression, and transforms the high-stakes chaos of the Buried City map into a strategic opportunity for raiders. More than just a simple ARC Raiders Items, this key is a symbol of risk and reward, guiding players through one of the game’s most treacherous yet rewarding points of interest (POI).

What Is the Buried City Hospital Key?

The Buried City Hospital Key is classified as a rare item in ARC Raiders, designed to grant access to a locked room within the Buried City’s hospital-a large, multi-story structure nestled in the northern portion of the sand-buried map. Unlike common keys that spawn predictably, this rare item has no fixed location, making its discovery a mix of luck, strategy, and thorough scavenging.

At its core, the key’s purpose is straightforward: it unlocks a hidden room in the northwest corner of the hospital’s second floor, where raiders can claim high-tier loot unavailable elsewhere in the area. For new and experienced players alike, this makes the key a must-have, as the rewards inside can significantly boost combat readiness and base upgrades.

Where to Find the Buried City Hospital Key

Locating the Buried City Hospital Key requires patience and knowledge of the game’s loot spawns. While it can appear in various locations, certain areas have a higher chance of spawning this rare item, making them priority targets for scavengers.

The Ruby Residence on the Dam Battlegrounds map is the most reliable spot to find the key, with the highest spawn rate compared to other locations. If the key does not spawn there, raiders can check the second floor of the Research and Administration building on the same map, though spawn chances are lower.

Alternatively, the key can be found through general scavenging across the game’s maps, including loot containers and as a reward for completing specific quests like “Life of a Pharmacist”. Regardless of where it spawns, raiders should prioritize storing the key in their safe pocket-ensuring they retain it even if they fail to extract alive and must return for another raid.

Using the Key: Unlocking the Hospital’s Hidden Loot Room

Once the key is acquired, raiders must navigate to the Buried City’s hospital-a sprawling, multi-level structure known for its complex layout and high player traffic. The hospital is easy to spot, as it is one of the largest buildings in the northern part of the map, with multiple floors and numerous rooms to explore.

To reach the locked room, raiders should head to the hospital’s second floor and make their way to the northwest corner-a section that requires careful navigation through hallways and potential encounters with ARC machines or rival raiders. The locked door is unmarked but can be identified by its distinct design, and using the key will grant immediate access to the hidden room.

Inside, raiders are rewarded with a treasure trove of high-tier loot. This includes rare weapons like the Torrente III and Il Toro III, various types of ammo (light, medium, heavy), healing items (bandages, herbal bandages, antiseptics), shield recharges, and even blueprints for crafting powerful equipment. For players focused on upgrading their base or improving their loadout, these rewards are invaluable.

The Hospital: More Than Just a Key Destination

While the key is the main draw, the Buried City Hospital itself is a critical POI in ARC Raiders, even for players without the key. As a large, multi-story building filled with medical loot, it is a popular destination for raiders seeking supplies to survive the harsh topside environment.

The hospital is also a key location for the “Medical Merchandise” quest, which requires raiders to loot three medical containers inside the building-a task made easy by the hospital’s abundant loot pools. Additionally, the hospital is the best location to farm laboratory reagents-a rare medical material needed to upgrade the Explosives Station and craft powerful grenades.

However, the hospital’s value comes with high risk. It is a frequent PvP flashpoint, as rival raiders converge on the area to claim its loot. ARC machines also patrol the building, especially on the upper floors, making stealth or combat readiness essential for survival. Fortunately, the hospital’s proximity to an extraction point allows raiders to make a quick escape if overwhelmed.

Why the Buried City Hospital Key Matters

In ARC Raiders’ extraction-based gameplay, every decision balances risk and reward-and the Buried City Hospital Key epitomizes this dynamic. For new players, the key provides a chance to acquire rare gear that would otherwise take hours of grinding to obtain. For experienced raiders, it offers a reliable source of high-tier loot to maintain their competitive edge.

Beyond its immediate rewards, the key encourages exploration and strategic gameplay. Raiders must plan their routes to find the key, navigate the dangerous Buried City map, and outmaneuver rivals and ARC machines to unlock the hidden room. This adds depth to the game’s loop, making each raid feel unique and rewarding.

Moreover, the key highlights the game’s attention to detail in world-building. The Buried City, a pre-collapse metropolis covered in sand dunes, tells a story of a world lost to chaos-and the hospital, with its hidden loot room, adds a layer of mystery and discovery to this desolate landscape. It reminds players that even in a world ravaged by ARC machines, hidden treasures wait for those willing to seek them out. Furthermore, at MMOexp, you can quickly and securely obtain various ARC Raiders resources—including cheap ARC Raiders BluePrints, materials, coins, and more.

In the end, the Buried City Hospital Key is more than just an item in ARC Raiders-it is a catalyst for adventure, a test of skill, and a gateway to survival. Whether you’re a solo raider seeking to upgrade your gear or a squad looking to dominate the competition, this rare key is a must-have. So grab your scavenging gear, navigate the sand-choked streets of the Buried City, and unlock the hospital’s secrets-your next great loot haul awaits.
ARC Raiders: The Ultimate Blueprint Farming Guide – Buried City Route

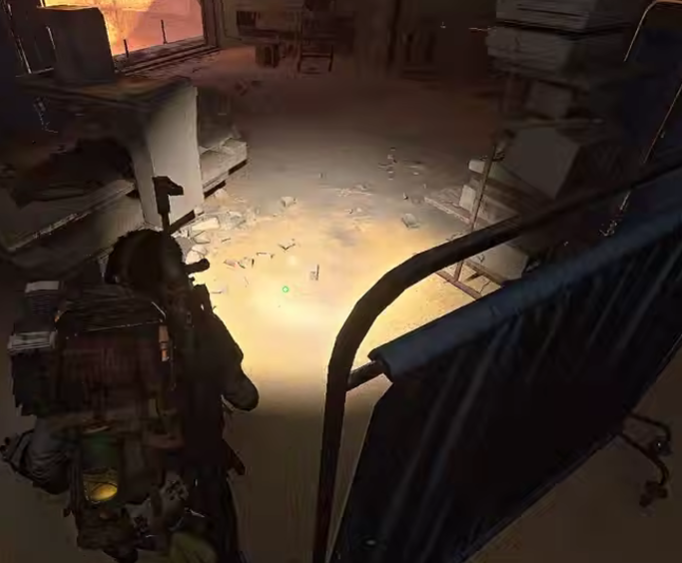
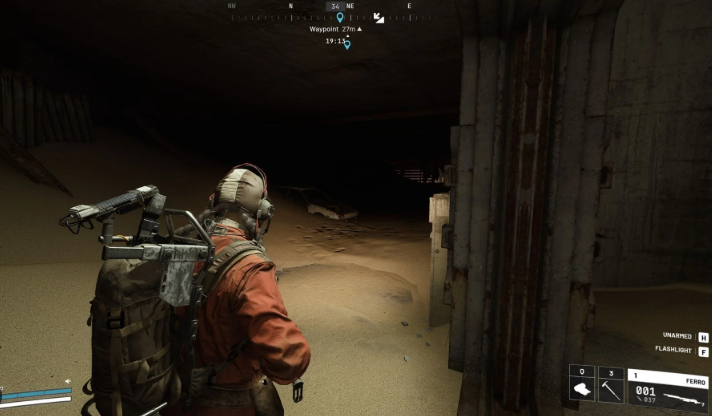
After 500+ hours of gameplay and nearly 300 hours specifically testing blueprint routes, I’ve developed what I firmly believe is the most efficient and safest path for farming blueprints on Buried City, and if you’re looking to supplement your farming efforts, you can always buy ARC Raiders Items to complete your collection faster. Following this exact route after the latest expedition update, I’ve already collected over half of the available blueprints in the game. This guide breaks down my complete route, the key buildings you need to prioritize, and the exact order to hit them for maximum efficiency and safety.

Spawn Dependent Adjustments

This guide assumes a south-side spawn, which is arguably the best starting position for blueprint farming. If you spawn elsewhere, you’ll need to adjust, but the core principle remains: prioritize high-value buildings in a logical rotation that minimizes travel time and maximizes uncontested loot opportunities.

The Complete Route Breakdown

1. Plaza Rosa Pharmacy (Primary Target)

Location: South side of Buried City

Priority: IMMEDIATE if you spawn nearby

This is unequivocally the best building on Buried City for blueprints. The concentration of containers here is unmatched, and as demonstrated in the run, it can single-handedly make your raid successful.

What we found:

· Hatch Key

· Muzzle Break 3 Blueprint

· Sentry Turret

· Multiple high-value attachments

· Why it’s worth rushing: The pharmacy consistently produces blueprints even after multiple behavior updates. Don’t waste time—if you spawn close, hit this building first before anyone else can get to it.

Pro Tip: Even if you don’t find blueprints immediately, the attachment spawns here are exceptional and will pad your wallet significantly.

2. Breachable Room Building (Opposite the Street)

Location: Directly across from the well-known contested building

Why this over the other breachable room: The other room across the street is one of the most contested spots on the map. Nine times out of ten, if you’re not first, it’s already looted. This alternative breachable room offers comparable loot with significantly less traffic.

What we found:

· Weapon Case (Torrenti)

· Globe (Pink item)

· Multiple containers

· Strategy: Even if you don’t find blueprints here, the weapon case spawn makes this worth checking. The room contains four containers and has historically been a reliable blueprint location.

3. Santa Maria Houses

Location: Adjacent to the breachable room area

Reality Check: These days, Santa Maria is often hit early. In our run, it was partially looted, but we still secured an unlooted weapon case.

What to look for:

· Ground floor containers

· Security breach potential

· Weapon case spawns

· Adaptation: If Santa Maria is fully looted, don’t linger. Move immediately to the next location. The key to efficient blueprint farming is momentum—don’t waste time on picked-over buildings.

4. Red Tower (Unmarked Location)

Location: Between Santa Maria and the second pharmacy

Why it’s special: This unmarked building is frequently overlooked, making it a goldmine for late-route looting.

What we found:

· Betina Blueprint

· Silencer 2 Blueprint

· Large Weapon Case

Loot Points:

· Second floor lockers (though blueprints from lockers are rare, check anyway)

· Weapon case spawns

· Climb the ladders for additional loot

· The Takeaway: Never skip unmarked buildings. The most experienced players gravitate toward named locations, leaving these hidden gems untouched longer into the raid.

5. Plaza Bristol Pharmacy (Secondary)

Location: Near the extract point, opposite side from Plaza Rosa

Comparison: This pharmacy has fewer containers than Plaza Rosa but remains worth checking.

What we found:

· Stable Stock 2 Blueprint

· Adrenaline Shots

· Various attachments

Loot Layout:

· Ground floor containers

· Second floor with four containers

· Suitcase spawns

· Note: While statistically less likely to produce blueprints than Plaza Rosa, it still offers solid attachment spawns and the occasional blueprint, as demonstrated.

6. Space Travel Building

Location: Central area, near research building

Loot Priority Floors: 3rd, 5th, and 6th floors

What to know: Space Travel is one of the best blueprint locations on the map. The concentration of containers on specific floors makes it a must-hit.

Floor Breakdown:

· 3rd Floor: High-value container cluster

· 4th Floor: Key card room location

· 5th & 6th Floors: Primary loot areas

· Our Experience: Space Travel was half-looted in our run—someone had found something valuable and extracted early. This happens frequently. Even partially looted, check remaining containers.

· Communication Tip: In our run, we encountered French players and coordinated verbally. A simple “friendly?” can save your run. Most players are focused on their own objectives.

7. Research Building

Location: Adjacent to Space Travel

Access: Can be reached from Space Travel’s 3rd floor via a jump or zipline

Blueprint Chance: Lower than Space Travel, but still worth checking

What we found:

· Key Card

· Multiple attachments

· Adrenaline Shots

· Drawer Strategy: Research Building is primarily drawer-based loot. Check everything systematically—blueprints can spawn in any container, though drawers have a lower chance than the specialized cases found in pharmacies and breachable rooms.

· Value Management: Our inventory hit 141,000 mid-raid. Learn to manage your space efficiently. Drop lower-value items for higher-value finds.

8. Hospital (Rooftop Priority)

Location: Central map, adjacent to parking garage

The Zipline Mistake: In our run, I didn’t bring a zipline, which cost me access to the hospital rooftop—one of the best loot locations.

Why you need a zipline:

· Rooftop contains special containers

· Weapon case spawns

· Security lockers

· Backpack spawns

· If you have a zipline: After looting the main hospital floors, zipline to the rooftop immediately.

· If you don’t have a zipline: Hospital becomes much less valuable. Check ground floors for scraps, but recognize that the best loot is inaccessible.

· Our Reality Check: Hospital was mostly looted by the time we arrived. At 10+ minutes into the raid, this is expected.

9. Parking Garage Basement

Quick Check Location: Worth a 30-second verification

The Jump Spot: There’s a quick jump to check if the basement has been looted without fully committing to the area.

Decision Point: If it’s looted (it was in our run), move on immediately. This area is well-known and rarely untouched late-raid.

10. Library Building

Location: Near the bus weapon case spawn

Loot Structure:

· Ground floor lockers

· Second floor (primary loot area with high trinket chance)

· Rooftop weapon case spawn

What we found:

· Pink statueette (161k value reached)

· Compensator 2

· Backpack spawn on second floor

The Value Climb: Our inventory hit 163,000 during library looting. This building consistently produces high-value trinkets that dramatically increase your raid profit.

Rooftop Check: Always check the rooftop for the weapon case spawn (marked location where I stood). It didn’t spawn in our run, but it’s a consistent spawn point worth verifying.

11. Hidden Loot Room (Zipline Access)

Location: Access via zipline, jump off at specific floor

Contents:

· Drawers

· Ammo crate

· Potential weapon case (didn’t spawn in our run)

· Reality: By this point in the raid (approaching final minutes), this room is often looted. Check quickly, but don’t expect much.

12. Morirano Station (Final Location)

Location: End-game area with hatch key extract

Three Loot Points:

1. Ground Weapon Case

· Located on the floor near the station entrance

· We found another blueprint here: Medium Gun Parts Blueprint

· Inventory hit 166,000

2. Rooftop Weapon Case

· Less known, often untouched

· Access requires climbing or zipline

· Consistent spawn

3. Breachable Room (Below)

· Two breachable containers

· Potential grenade tube

· Weapon case spawn chance

· More frequently looted than rooftop

· The Hatch Key Extract: Located directly at Morirano Station. This is why we bring a hatch key—safe extract after looting the final area.

· Final Inventory: 163,979 value, 4 blueprints, 5 pink items, including a Deadline and Anvil Splitter.

Complete Route Summary (Visual Guide)

1. South Spawn → Plaza Rosa Pharmacy (Priority #1)

2. Breachable Room (across from contested building)

3. Santa Maria Houses (check, don’t linger if looted)

4. Red Tower (unmarked goldmine)

5. Plaza Bristol Pharmacy (near extract)

6. Space Travel Building (3rd, 5th, 6th floors)

7. Research Building (adjacent to Space Travel)

8. Hospital (ZIPLINE MANDATORY for rooftop)

9. Parking Garage Basement (quick check)

10. Bus Weapon Case (check spawn)

11. Library (ground, second floor, rooftop)

12. Hidden Zipline Room (quick check)

13. Morirano Station (ground, rooftop, breachable room)

14. Hatch Key Extract

Time Management

Total Run Duration: Approximately 20-25 minutes

Extract Window: Always leave 2-3 minutes for extract

In our run, we had 6 minutes remaining at Morirano Station and still comfortably extracted. Don’t cut it too close—ark spawns and unexpected engagements can delay you.

Final Thoughts

After nearly 300 hours of blueprint farming and 500+ total hours in ARC Raiders, this route represents the most efficient path I’ve found for Buried City day raids. The proof is in the results: 4 blueprints, 5 pink items, and over 160k value in a single run. Of course, if you want to skip the grind altogether, you can visit MMOEXP to buy cheap ARC Raiders BluePrints and get straight to the action.

Remember: the game evolves, players learn, and routes must adapt. What worked at launch may not work now. This route accounts for current player behavior patterns and blueprint spawn mechanics after the latest updates.

If you found this guide helpful, apply it on your next Buried City run. Prioritize the pharmacies, hit the red tower, and always—ALWAYS—bring a zipline. Happy farming, Raiders. And don’t forget to check out MMOEXP for all your ARC Raiders needs.

ARC Raiders Mission Guide: How to Finish What We Left Behind Safely

If you’re looking for one of the best early-game quests in ARC Raiders, What We Left Behind should be at the top of your list. It’s low-risk, requires no special gear, and rewards you with Tier II weapon attachments that remain valuable well into mid-game progression.

This complete step-by-step walkthrough covers:

·Exact objective locations

·Safe extraction routes

·Loot opportunities

·Full breakdown of the weapon attachment rewards

·Which weapons benefit most

·Why completing this quest reduces your need to buy ARC Raiders BluePrints early

Best of all, you can run this quest using free loadouts, allowing you to preserve high-value ARC Raiders Items for later missions.

Quest Overview: What We Left Behind

This quest includes three objectives, each located on a different map:

·Buried City

·Dam Battlegrounds

·Spaceport

No special consumables are required. Because the objectives are mostly navigation-based rather than combat-heavy, you can safely use basic gear and avoid risking rare ARC Raiders Items.

After completing all three objectives, return to Tian Wen to receive your Tier II weapon attachments.

Objective 1: Parking Garage – Buried City

Your first task takes place in Buried City, specifically at the Parking Garage near the Hospital landmark.

Step-by-Step Instructions

1. Spawn into Buried City.

2. Head toward the central Parking Garage.

3. Enter and locate the elevator.

4. Interact with the elevator to breach it.

Important tips:

·The breach works on all floors.

·The ground floor is recommended due to fewer environmental hazards like Pops or Fireballs.

·After breaching, take the zipline downward.

·Close doors behind you to slow the pursuing Raiders.

At the bottom, you’ll find a Raider Camp.

Search two containers inside the camp to complete the objective.

Bonus Loot Opportunity

There is a chance for a weapon crate to spawn here. These crates can drop Purple rarity weapons, making this location worthwhile even outside the quest.

Safe Extraction Route (Buried City)

After completing the objective:

·Jump out of the nearby window.

·Turn right twice.

·Head down into the metro station.

This path typically offers a safer extraction route compared to open streets.

Objective 2: South Swamp Outpost – Dam Battlegrounds

Next, deploy to Dam Battlegrounds and head to South Swamp Outpost.

This location resembles a silo-shaped structure and can be confusing because of its multiple entry points.

Step-by-Step Instructions

1. Enter South Swamp Outpost.

2. Use any of the open gaps around the building to get inside.

3. Locate the interactable item in one corner of the structure.

4. Interact with it to complete the objective.

The objective is straightforward once inside. If the structure looks like a silo, you’re in the correct place.

Objective 3: Container Storage – Spaceport

The final objective takes place on the Spaceport map, near Container Storage, also known as Bilgunn’s Hideout.

Step-by-Step Instructions

1. Spawn into Spaceport.

2. Move toward the right side of Container Storage.

3. Look for a broken wall section allowing crossover access.

4. Be cautious-this area can expose you to sniper fire.

5. Locate the metal container mounted on the wall.

6. Find the ladder and climb up.

7. Grab the notes to complete the objective.

Once collected, you can extract immediately.

What We Left Behind Rewards – Tier II Attachments Explained

After returning to Tian Wen, you’ll receive three Tier II weapon attachments:

·Muzzle Brake II

·Vertical Grip II

·Stable Stock II

These attachments provide meaningful upgrades and remain useful well beyond the early game.

Muzzle Brake II – Best Weapons

Best paired with:

·enegade

·Bettina

·Kettle

Benefits:

·Reduces recoil

·Improves sustained fire accuracy

·Enhances automatic weapon control

This attachment is ideal for high fire-rate weapons where recoil control directly impacts DPS.

Vertical Grip II – Best Weapons

Best paired with:

·IL Toro

·Vulcano

·Arpeggio

·Hullcracker

Benefits:

·Controls vertical recoil

·Improves stability during prolonged engagements

·Ideal for heavier rifles

If you struggle with recoil climb, this attachment makes a noticeable difference.

Stable Stock II – Best Weapons

Best paired with:

·Stitcher

·Osprey

·Rattler

·IL Toro

Benefits:

·Improves weapon steadiness

·Enhances mid-range tracking

·Supports hybrid combat builds

This is especially strong for players who prefer consistent tracking over burst damage.

Why This Quest Is So Valuable

Completing What We Left Behind early provides:

·Strong early attachment upgrades

·Reduced the need to buy ARC Raiders BluePrints immediately

·Better performance in mid-tier fights

·More efficient resource farming

Instead of spending valuable Coins to buy ARC Raiders Blueprints for attachment crafting, you earn powerful upgrades through quest progression.

This preserves your currency for higher-impact investments later.

Risk Management Tips

To minimize losses:

·Use free loadouts.

·Avoid engaging in unnecessary PvP.

·Close doors behind you.

·Extract immediately after completing objectives.

·Preserve rare ARC Raiders Items for higher-stakes missions.

This quest is about map knowledge, not combat dominance.

Final Thoughts

What We Left Behind is one of the best early quests in ARC Raiders. It teaches navigation, encourages safe extraction habits, and rewards players with attachments that genuinely improve weapon performance.

By completing it early, you:

·Strengthen your loadout

·Save currency

·The need to buy ARC Raiders BluePrints prematurely

·Preserve valuable ARC Raiders Items

·Build a solid progression foundation

If you’re starting fresh or entering a new Expedition, prioritize this quest. It’s efficient, rewarding, and low-risk – exactly what early progression should be.

Complete Breakdown of the ARC Raiders Major Update

ARC Raiders has rolled out one of its most ambitious updates so far, delivering a sweeping mix of new systems, player-focused improvements, and extensive technical refinements. This patch goes far beyond simple balance tweaks, introducing high-risk matchmaking options, permanent progression goals, meaningful social improvements, and hundreds of fixes across gameplay, maps, UI, and performance.

Solo vs Squads:A New Test of Skill and Nerve

At the core of this update is Solo vs Squads, a new matchmaking option built specifically for confident, high-level players who want to push themselves in PvP-heavy environments.

Eligibility

Available to solo players who have reached level 40 or higher

How It Works

A toggle appears above the matchmaking button

When enabled, the player enters the standard squad queue alone

Rewards

20% bonus XP is awarded at the end of the run

The bonus applies whether the player extracts successfully or is eliminated

Solo vs Squads dramatically raises the stakes by forcing lone players to face coordinated teams. It rewards sharp mechanics, smart positioning, and fast decision-making under pressure. Even failed runs remain worthwhile thanks to the guaranteed XP bonus.

Current limitation:There is no automatic alert when this mode unlocks at level 40, so players must manually check the matchmaking options.

Trophy Display:A Permanent Progression System

The update also introduces the Trophy Display, a long-term progression feature designed for players who enjoy collecting and showcasing achievements over time. Structurally similar to the Candleberry Project, this system focuses on defeating dangerous ARC enemies.Unlock your full potential in ARC Raiders with premium ARC Raiders Items delivered fast and securely from MMOexp.

How It Functions

Players gather ARC enemy components during Expeditions

Parts are submitted to upgrade the Trophy Display

The display progresses through five upgrade tiers

Each tier adds new visual elements to the display, gradually transforming it into a showcase of your accomplishments.

Rewards

Every upgrade tier grants:

Blueprints

Raider Tokens

Completing all five tiers unlocks:

Howl emote

Guitar cosmetic

300,000 Coins

This progression track has no expiration date and is unaffected by Expedition resets, making it a permanent goal rather than a time-limited grind.

New Augments and Quest Content

Progression options have been expanded with additional content designed to increase build variety and provide clearer objectives during Expeditions.

New Additions

2 new Epic Augments

7 new Quests

These additions allow players to experiment with more specialized builds and give extra structure to longer runs. The Epic Augments, in particular, raise the importance of high-quality gear, making optimized loadouts more impactful in difficult encounters.

Social Features and Accessibility Enhancements

Several quality-of-life improvements focus on smoother party play and better input customization.

Open Parties

Parties can now be set to open

Friends can join freely, even while a match is in progress (they’ll enter the next round)

Expanded Squad Invites

Any squad member can now invite others

Invitations are no longer restricted to the party leader

Input and Control Updates

Mouse smoothing option added

Full controller button rebinding implemented

Aim assist behavior standardized across different frame rates

These updates improve consistency and accessibility across different control setups.

Enemy AI and Combat Readability Improvements

Enemy behavior has been refined to reduce frustration and improve clarity during fights:

ARC units navigate terrain and obstacles more reliably

Leapers behave more naturally after losing legs

Shredder remains now properly appear as lootable

Snitches stop producing sound after being destroyed and no longer cancel alerts incorrectly

Spotters no longer pursue players into buildings

Tick enemies now allow a short dodge-roll window for removal

Together, these changes improve combat readability without reducing challenge.

Map Fixes and Loot Adjustments

All maps received attention in this update, with fixes aimed at improving flow, rewards, and navigation.

Global Adjustments

Blueprint container spawns reduced in certain scenarios

Higher-tier weapons appear more frequently in weapon cases

Drop rates adjusted for Matriarch and Queen unique components

Numerous non-interactable containers fixed

Location-Specific Updates

Dam Battlegrounds

Collision problems resolved

Common stuck spots removed

Buried City

Invisible walls eliminated

Musical puzzle removed

Spaceport

Floating assets corrected

ARC spawn behavior adjusted

Stella Montis

Seed Vault extraction bug fixed

Night Raid lighting improved

Over 40 stuck locations removed

Loot distribution rebalanced

This update represents a major step forward for ARC Raiders. With Solo vs Squads delivering intense high-risk PvP, the Trophy Display offering lasting progression, expanded build options through new augments and quests, and hundreds of fixes improving stability and fairness, the game has never been in a stronger state.From casual runs to high-stakes battles, MMOexp has the cheap ARCR Items you need to thrive.

Whether you’re chasing extreme challenges or long-term progression goals, this patch meaningfully elevates the ARC Raiders experience.