Master the Inferno’s Gateway: Ultimate OSRS TzHaar Fight Cave Survival Guide for TzTok-Jad Glory

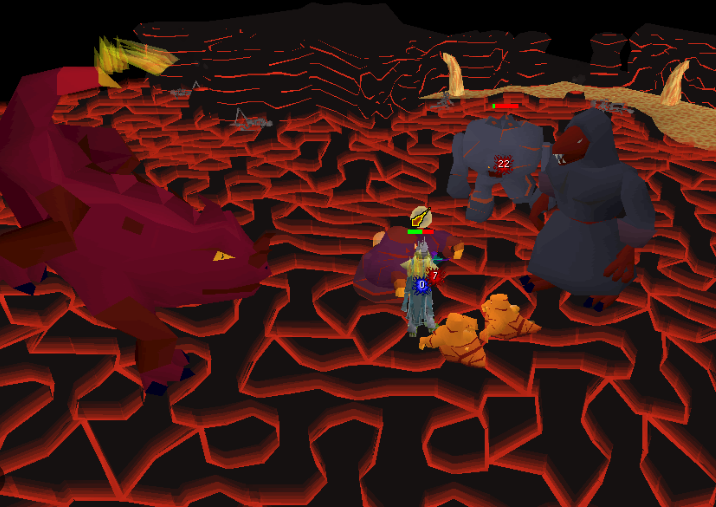
Old School RuneScape’s TzHaar Fight Cave is one of the most intense PvE challenges in Old School RuneScape, pushing players through 63 waves of increasingly dangerous enemies before facing the legendary TzTok-Jad. Can you survive flawless prayer switching under pressure? Are your gear choices optimized for endurance rather than burst damage? Do you know how to handle multiple threats while conserving supplies for the final boss?

This guide breaks down everything you need, from preparation to execution, so you can finally earn your Fire Cape.

If you want a smoother progression, consider purchasing resources from RSorder to boost your preparation and efficiency early on.

1. Understanding the TzHaar Fight Cave Challenge

Key Takeaways:

·63 waves of escalating combat difficulty

·Mixed enemy types: melee, ranged, and magic

·Final boss: TzTok-Jad requires perfect prayer timing

·No checkpoints-death means restarting

The Fight Cave is not just about DPS; it is a test of endurance, awareness, and mechanical precision. Each wave introduces more complex enemy combinations, forcing players to reposition and react constantly. By the time you reach Jad, even a single mistake can end your run.

2. Preparation: Gear, Inventory, and Strategy

Key Takeaways:

·Balanced gear > pure damage setups

·Prayer potions are essential for survival

·Ranged is the safest combat style

·Sound cues matter for reaction timing

Before entering, ensure you are fully equipped with high-tier ranged gear such as Karil’s or blowpipe setups. Bring ample prayer potions, restore potions, and a few emergency healing items like Saradomin brews. Efficient preparation saves time and reduces risk during later waves.

A smart economy also helps progression-many players use OSRS gold to secure upgraded gear early, reducing grind time and improving consistency in mid-to-late waves.

3. Wave-by-Wave Survival Strategy

Key Takeaways:

·Always prioritize healers and rangers first

·Use pillars for line-of-sight control

·Trap melee enemies behind obstacles

·Maintain prayer discipline at all times

Early waves are about positioning, not rushing kills. Use the central pillars to isolate enemies and reduce incoming damage. As waves progress, focus on eliminating ranged and magic threats first since they deal unavoidable damage if ignored. Efficient wave control is what separates consistent Fire Cape runners from repeated failures.

4. Facing TzTok-Jad: The Final Test

Key Takeaways:

·One-hit mechanics demand perfect reaction timing

·Audio cues are critical for prayer switching

·Healers must be managed immediately

·Panic leads to instant failure

Jad’s attacks are telegraphed by animation and sound. A stomp signals melee, a raise indicates ranged, and a magic fireball follows a casting animation. The key is calm reaction-switch prayers immediately without hesitation. If healers spawn, prioritize tagging them while maintaining prayer discipline.

This is also where preparation matters most. Some players choose to buy OSRS gold to upgrade gear beforehand, ensuring faster, earlier waves and more supplies preserved for this final encounter.

5. Rewards and Why It Matters

Key Takeaways:

·Fire Cape is one of the best melee capes

·Unlocks prestige and combat bonuses

·Proof of high mechanical skill

·Essential for many mid-to-late game builds

Completing the Fight Cave grants the Fire Cape, a highly respected item in OSRS progression. Beyond stats, it symbolizes mastery of core combat mechanics and is often required for optimized PvM setups.

Who This Guide Is For & Value

This guide is designed for mid-to-late game players struggling with consistent Fire Cape runs, returning players relearning mechanics, and efficiency-focused grinders looking to optimize their PvM progression. It delivers structured survival methods, preparation strategies, and boss-fight breakdowns that reduce randomness and increase success rate.

Helpful Tips for Success

·Practice prayer switching before attempting Jad

·Use visual markers around pillars for positioning

·Turn on game sounds for attack recognition

·Stay patient-rushing leads to mistakes

·Always conserve supplies for later waves

Core Benefits Summary

·Faster Fire Cape acquisition

·Improved PvM mechanics and reaction speed

·Better resource management during long fights

·Higher survival consistency in late-game content

Mastering the Fight Cave is a milestone in every player’s journey through Old School RuneScape. With the right preparation, disciplined execution, and smart resource management, TzTok-Jad becomes less of a wall and more of a victory lap. For players who want to accelerate their progress, RSorder offers an easy way to strengthen their setup before the grind begins, helping them focus on skill, not struggle.

Diablo 4: How to Beat Ah Bulan Boss

Ah Bulan stands as one of the most challenging elite bosses in Diablo 4’s endgame content, known for its chaotic area attacks, tricky clone mechanics, and disruptive orb abilities. This spirit guardian boss tests players’ positioning awareness, mobility, and burst damage execution. Many players struggle with its overlapping damage zones and endless add spawns, but with structured strategies and proper preparation, defeating Ah Bulan becomes far more manageable. This guide breaks down every core mechanic and step-by-step tactic to conquer this powerful foe. Upon completing the task, you will receive more Diablo 4 Items, materials, and other rewards.

Pre-Fight Preparation for Ah Bulan Encounter

Successful Ah Bulan fights start with solid pre-battle setup. First, prioritize high mobility on your build. Skills with short-cooldown dashes, teleports, or enhanced evade charges are non-negotiable, as the arena is filled with continuous damage zones. Melee and ranged builds alike need reliable ways to reposition quickly.

Equip defensive elixirs to counter the boss’s signature damage types. Shadow resistance elixirs reduce sustained damage from spirit attacks, while movement speed elixirs help evade slow orb fields. Additionally, clear your inventory and repair gear beforehand. Long fights against Ah Bulan often lead to heavy gear wear, and broken equipment will cripple your damage and defense mid-battle.

For group players, a balanced team setup works best. Tanks can hold aggro and stabilize boss positioning, DPS focus on burst damage windows, and support players maintain team health to avoid sudden wipes.

Understand Ah Bulan’s Core Attack Mechanics

Mastery of Ah Bulan’s move set is the key to survival. The boss utilizes two deadly orb types throughout the entire fight. Spirit orbs revolve tightly around Ah Bulan, and any direct hit applies a vulnerable debuff that amplifies all incoming damage significantly. Never get close to these rotating orbs during combat.

Slow orbs are the second major threat. These projectiles fly outward from the boss and leave lingering slow fields on the ground. Stepping into these zones drastically reduces movement speed, leaving you trapped and exposed to follow-up one-shot attacks. Always scan the arena floor and avoid darkened slow zones at all costs.

At mid-health, Ah Bulan summons four centaur clone duplicates to overwhelm players. These clones deal consistent physical damage and surround the arena, making free movement nearly impossible if left unchecked.

Effective Phase-by-Phase Combat Strategy

In the opening phase, focus on safe, consistent damage while maintaining optimal positioning. Stay behind Ah Bulan to avoid frontal orb barrages, and use evade skills to dodge sudden orb bursts. Do not overcommit damage early; prioritize learning the boss’s attack rhythm.

When the clone spawn phase triggers, adjust your movement immediately. Run in wide circular paths along the arena’s outer edge to herd all four centaur clones into a tight cluster. Grouping the adds eliminates scattered threats and creates a perfect window for area-of-effect burst damage.

Unleash your ultimate abilities and highest DPS AoE skills to eliminate all clones in one burst. Clearing the clones quickly is critical, as leaving them alive will stack pressure and lead to unavoidable damage. After the adds fall, refocus all fire on Ah Bulan.

In the final low-health phase, Ah Bulan amplifies all attacks and spawns orbs more frequently. Preserve your mobility skills and evade charges for emergency repositioning. Avoid greedy damage plays, and strike only during short, safe openings between attack cycles.

Final Tips for a Clean Victory

Patience is essential when fighting Ah Bulan. Rushing damage or ignoring environmental danger zones is the most common cause of death. Always prioritize survival over maximum DPS, especially in the late fight stages. Get ready to use cheap Diablo 4 Gold to help you quickly grow stronger and defeat your enemies faster.

Repeat the positioning and add-clearing cycle consistently, and you will steadily deplete Ah Bulan’s health. With practiced movement, proper ability timing, and careful mechanic awareness, even solo players can defeat this formidable Diablo 4 boss and earn valuable endgame loot rewards.

Diablo 4 Clash Paladin Endgame Build Guide

The Paladin has quickly become one of the most popular classes in Diablo 4 Season 13, and among its strongest endgame setups is the devastating Clash Paladin build. Combining massive Resolve scaling, exceptional survivability, and explosive melee damage, Clash Paladin has emerged as one of the most powerful options for players pushing high-tier Pit content and Torment difficulties.

What Is the Clash Paladin Build?

Clash Paladin is an endgame-focused melee build centered around the Clash skill and Resolve stacking mechanics. The build scales its damage output through defensive bonuses, allowing players to transform survivability stats into massive offensive power.

Recent Season 13 build guides describe Clash Paladin as one of the strongest Paladin setups for endgame pushing due to its incredible scaling potential.

The core gameplay loop revolves around:

·Building high Resolve stacks

·Maintaining Fortress bonuses

·Triggering Clash damage bursts

·Using defensive auras for scaling

·Maximizing survivability and uptime

Unlike faster farming builds, Clash Paladin focuses on raw endgame dominance and sustained damage against difficult enemies.

Why Clash Paladin Is So Strong in Season 13

One of the biggest reasons Clash Paladin performs so well is its synergy with Season 13 defensive mechanics.

According to updated build guides, the build can stack over 70 Resolve stacks, dramatically increasing its damage output through Fortress interactions and defensive scaling.

This creates several major advantages:

·Massive burst damage

·Excellent survivability

·Strong boss-killing potential

·Great Pit pushing performance

·Consistent scaling into Torment 12

Because the build scales through defensive mechanics, Clash Paladin remains surprisingly durable even during extremely difficult encounters.

Many players also enjoy the straightforward gameplay style. Unlike high-APM builds requiring constant positioning and combo management, Clash Paladin focuses more on timing, defensive management, and heavy melee pressure.

Best Skills for Clash Paladin

While specific setups vary depending on gear and progression, most Clash Paladin builds use a combination of offensive melee attacks and defensive aura support.

Common core skills include:

·Clash

·Fortress

·Defiance Aura

·Fanaticism Aura

·Rally

·Seize Them

These skills work together to maximize Resolve stacking while boosting survivability and offensive scaling simultaneously.

Several expert guides also recommend defensive utility skills because the build’s damage increases significantly when survivability remains stable during combat.

Best Diablo 4 Items for Clash Paladin

Like most top-tier endgame builds, Clash Paladin depends heavily on optimized Diablo 4 Items.

Proper gear progression dramatically increases the build’s performance, especially once players begin acquiring high-end Ancestral and Mythic gear.

Important Diablo 4 Items commonly used include:

·Mantle of the Grey

·Resolve-stacking gear

·Cooldown reduction affixes

·Fortress-enhancing aspects

·High armor and defensive stat rolls

Players also prioritize:

·Maximum Life

·Critical Strike Chance

·Resource generation

·Damage Reduction

·Barrier bonuses

Because the build converts defense into damage, defensive affixes become far more valuable than they are on many other classes.

High-end Diablo 4 Items with Greater Affixes can massively improve Clash Paladin performance in Pit pushing and boss encounters.

Best Activities for Clash Paladin

Clash Paladin excels primarily in difficult endgame content.

Pit Pushing

This is where the build truly shines.

Recent community guides specifically showcase Clash Paladin clearing Pit 120+ content with optimized gear setups.

Its survivability and scaling make it one of the strongest Paladin builds for advanced progression.

Infernal Hordes

The build’s durability allows it to survive dangerous enemy waves while dealing massive area damage through Clash interactions.

Torment Boss Farming

Because of its high single-target scaling, Clash Paladin performs extremely well against Tormented bosses and other difficult encounters.

Weaknesses of Clash Paladin

Despite its strengths, Clash Paladin is not perfect.

Several Season 13 build guides mention that the build suffers from weaker mobility compared to faster farming classes and speed-clearing setups.

Potential weaknesses include:

·Slower movement speed

·Gear dependency

·Requires optimized scaling

·Can feel repetitive for some players

Community discussions also suggest that some Paladin builds struggle in the absolute highest-end content compared to dominant meta classes like Barbarian and Sorcerer.

However, Clash remains one of the strongest Paladin-specific options currently available.

Farming Gear Efficiently

Efficient gear farming is critical for maximizing Clash Paladin performance.

Players typically farm:

·Nightmare Dungeons

·The Pit

·Infernal Hordes

·Tormented Bosses

·Helltides

Because the build depends heavily on high-quality Diablo 4 Items, farming Greater Affix gear becomes extremely important during progression.

Many players also choose to buy Diablo IV gold to speed up:

·Masterworking upgrades

·Enchanting rerolls

·Horadric crafting

·Gear optimization

·Resource acquisition

Gold management is especially important for Paladin builds because endgame crafting costs can become extremely expensive when chasing perfect affixes.

Is Clash Paladin Worth Playing?

For players who enjoy durable melee combat and massive scaling potential, Clash Paladin is absolutely worth trying in Season 13.

The build offers:

·Incredible survivability

·Huge damage scaling

·Strong endgame viability

·Excellent boss performance

·Rewarding gear progression

Community feedback also suggests that many Paladin players enjoy the build because it captures the classic holy warrior fantasy while still remaining competitive in modern Diablo 4 endgame content.

Final Thoughts

Clash Paladin has established itself as one of the strongest Paladin builds in Diablo 4 Season 13. By converting defensive scaling into devastating offensive power, the build delivers exceptional performance in Pit pushing, Torment content, and high-end boss encounters.

Path of Exile 3.28 Guide: Mastering Pseudo 7-Links

As Path of Exile prepares to launch Patch 3.28 “Mirage” on March 6, 2026, players are already analyzing how the new league mechanics could reshape endgame gearing. Among the most exciting developments is the rise of pseudo 7-links—a system that expands build potential beyond the long-standing six-link limit without altering socket rules.

In the current system, items can have up to six linked sockets, allowing a skill gem to interact with multiple support gems simultaneously. This setup—commonly known as a 6-link—is one of the most important upgrades a character can achieve, often marking the transition into serious endgame power.

Because of its impact, most builds are designed around maximizing the effectiveness of a single fully linked skill.

Despite the name, pseudo 7-links do not introduce an actual seventh socket. Instead, they rely on new Mirage league mechanics that grant an additional support-like effect directly to a skill gem, separate from the socket system.

This effectively allows a skill to benefit from more than six support modifiers at once, something that was previously impossible under normal conditions.

Mirage Currency and Gem Imbuing

The key to this system lies in new league-specific currency items introduced in Patch 3.28:

Coin of Knowledge
Coin of Power
Coin of Skill

These items can be applied to a level 20 non-Vaal skill gem, granting it a random support effect aligned with its color type. This bonus acts independently from linked supports, meaning it stacks on top of your existing setup.Don’t wait for victory—buy your POE currency and start dominating the realm!

Step-by-Step: Creating a Pseudo 7-Link

To take advantage of this mechanic:

1.Build a standard 6-link setup using your primary skill and chosen support gems.

2.Apply a Mirage coin to a level 20 version of that skill to add a bonus support effect.

3.Socket the enhanced gem into your item.

Once equipped, the skill benefits from both its linked supports and the additional imbued modifier—effectively surpassing the traditional limit.

Why It’s Powerful

Because the extra effect is not tied to sockets, it doesn’t consume a link slot. This creates new possibilities, such as:

Adding utility supports without sacrificing damage
Covering weaknesses in a build’s support setup
Unlocking combinations that previously competed for limited slots

In practice, this can feel like running a “7-link,” even though the system itself remains unchanged.

Limitations to Consider

The mechanic comes with several restrictions that prevent it from becoming overpowered:

Only standard level 20 gems can be imbued
Level 21 and Vaal gems are excluded
Only one imbued gem per item is allowed

These constraints encourage careful planning and make the mechanic most impactful when focused on a single core skill.

Comparing Pseudo 7-Links to Traditional Setups

While 6-links are still essential, pseudo 7-links introduce a new layer of optimization.

Benefits

Greater customization for advanced builds
Additional power without needing new gear types
Encourages experimentation and theorycrafting

Downsides

Mirage coins may be difficult to obtain early on
Limited eligibility for certain gem types
Cannot stack multiple enhanced gems on the same item

Because of this, most players will still aim to secure a strong 6-link first, then enhance it later with Mirage mechanics.

Economic and Meta Impact

The introduction of pseudo 7-links is likely to influence both item demand and currency values:

High-quality 6-link items may become even more valuable early in the league

Mirage currency prices could fluctuate based on drop rates and demand

Efficient Mirage farming strategies will play a major role in progression

Players aiming to stay competitive may prioritize early investment into strong gear bases to fully capitalize on the system.

Ideal Skills for Pseudo 7-Links

This mechanic shines brightest when used on skills that:

Depend heavily on multiple support interactions
Lack clearly optimal support combinations
Serve as the centerpiece of a build

Examples include Blade Vortex, Earthshatter, and Caustic Arrow, though many other skills could benefit depending on the imbued effect.

Coins of Knowledge, Power, and Skill are earned through Mirage-specific content, particularly by completing Wish modifiers in Mirage zones. These modifiers increase rewards and improve currency drops, especially within the Astral Realm.

Players who focus on this content early will have a clear advantage in acquiring the resources needed for pseudo 7-link setups.

Pseudo 7-links stand out as one of the most innovative features in Path of Exile 3.28. Rather than changing the core socket system, they build on it—offering a new layer of depth without disrupting the game’s foundation.Prepare for greatness—buy your cheap Path of exile currency at MMOexp today!

For players who enjoy optimizing builds and pushing efficiency, this system opens up exciting new possibilities and ensures that theorycrafting in 3.28 will be more dynamic than ever.

Buried city hospital key in ARC Raiders

In the desolate, sand-choked world of ARC Raiders, every loot item and key holds the potential to turn the tide of survival. Among the game’s most sought-after collectibles, the Buried City Hospital Key stands out as a rare and valuable tool-one that unlocks hidden rewards, drives quest progression, and transforms the high-stakes chaos of the Buried City map into a strategic opportunity for raiders. More than just a simple ARC Raiders Items, this key is a symbol of risk and reward, guiding players through one of the game’s most treacherous yet rewarding points of interest (POI).

What Is the Buried City Hospital Key?

The Buried City Hospital Key is classified as a rare item in ARC Raiders, designed to grant access to a locked room within the Buried City’s hospital-a large, multi-story structure nestled in the northern portion of the sand-buried map. Unlike common keys that spawn predictably, this rare item has no fixed location, making its discovery a mix of luck, strategy, and thorough scavenging.

At its core, the key’s purpose is straightforward: it unlocks a hidden room in the northwest corner of the hospital’s second floor, where raiders can claim high-tier loot unavailable elsewhere in the area. For new and experienced players alike, this makes the key a must-have, as the rewards inside can significantly boost combat readiness and base upgrades.

Where to Find the Buried City Hospital Key

Locating the Buried City Hospital Key requires patience and knowledge of the game’s loot spawns. While it can appear in various locations, certain areas have a higher chance of spawning this rare item, making them priority targets for scavengers.

The Ruby Residence on the Dam Battlegrounds map is the most reliable spot to find the key, with the highest spawn rate compared to other locations. If the key does not spawn there, raiders can check the second floor of the Research and Administration building on the same map, though spawn chances are lower.

Alternatively, the key can be found through general scavenging across the game’s maps, including loot containers and as a reward for completing specific quests like “Life of a Pharmacist”. Regardless of where it spawns, raiders should prioritize storing the key in their safe pocket-ensuring they retain it even if they fail to extract alive and must return for another raid.

Using the Key: Unlocking the Hospital’s Hidden Loot Room

Once the key is acquired, raiders must navigate to the Buried City’s hospital-a sprawling, multi-level structure known for its complex layout and high player traffic. The hospital is easy to spot, as it is one of the largest buildings in the northern part of the map, with multiple floors and numerous rooms to explore.

To reach the locked room, raiders should head to the hospital’s second floor and make their way to the northwest corner-a section that requires careful navigation through hallways and potential encounters with ARC machines or rival raiders. The locked door is unmarked but can be identified by its distinct design, and using the key will grant immediate access to the hidden room.

Inside, raiders are rewarded with a treasure trove of high-tier loot. This includes rare weapons like the Torrente III and Il Toro III, various types of ammo (light, medium, heavy), healing items (bandages, herbal bandages, antiseptics), shield recharges, and even blueprints for crafting powerful equipment. For players focused on upgrading their base or improving their loadout, these rewards are invaluable.

The Hospital: More Than Just a Key Destination

While the key is the main draw, the Buried City Hospital itself is a critical POI in ARC Raiders, even for players without the key. As a large, multi-story building filled with medical loot, it is a popular destination for raiders seeking supplies to survive the harsh topside environment.

The hospital is also a key location for the “Medical Merchandise” quest, which requires raiders to loot three medical containers inside the building-a task made easy by the hospital’s abundant loot pools. Additionally, the hospital is the best location to farm laboratory reagents-a rare medical material needed to upgrade the Explosives Station and craft powerful grenades.

However, the hospital’s value comes with high risk. It is a frequent PvP flashpoint, as rival raiders converge on the area to claim its loot. ARC machines also patrol the building, especially on the upper floors, making stealth or combat readiness essential for survival. Fortunately, the hospital’s proximity to an extraction point allows raiders to make a quick escape if overwhelmed.

Why the Buried City Hospital Key Matters

In ARC Raiders’ extraction-based gameplay, every decision balances risk and reward-and the Buried City Hospital Key epitomizes this dynamic. For new players, the key provides a chance to acquire rare gear that would otherwise take hours of grinding to obtain. For experienced raiders, it offers a reliable source of high-tier loot to maintain their competitive edge.

Beyond its immediate rewards, the key encourages exploration and strategic gameplay. Raiders must plan their routes to find the key, navigate the dangerous Buried City map, and outmaneuver rivals and ARC machines to unlock the hidden room. This adds depth to the game’s loop, making each raid feel unique and rewarding.

Moreover, the key highlights the game’s attention to detail in world-building. The Buried City, a pre-collapse metropolis covered in sand dunes, tells a story of a world lost to chaos-and the hospital, with its hidden loot room, adds a layer of mystery and discovery to this desolate landscape. It reminds players that even in a world ravaged by ARC machines, hidden treasures wait for those willing to seek them out. Furthermore, at MMOexp, you can quickly and securely obtain various ARC Raiders resources—including cheap ARC Raiders BluePrints, materials, coins, and more.

In the end, the Buried City Hospital Key is more than just an item in ARC Raiders-it is a catalyst for adventure, a test of skill, and a gateway to survival. Whether you’re a solo raider seeking to upgrade your gear or a squad looking to dominate the competition, this rare key is a must-have. So grab your scavenging gear, navigate the sand-choked streets of the Buried City, and unlock the hospital’s secrets-your next great loot haul awaits.