Path of Exile 2:Prince Azmadi,Faridun Heir-Boss Guide

The duel against Azmadi,Prince of the Faridun,has quickly become infamous among Path of Exile 2 players. Introduced during the Interlude,this mandatory campaign fight is a brutal test of patience,reflexes,and mechanical skill. For fragile ranged characters or builds with limited defenses,Azmadi relentless pressure can feel downright punishing-one mistake often snowballs into a deadly combo lock.

Where to Find Azmadi

You’ll encounter Azmadi in the second Interlude quest,set within the Qumah Reservoir-a key region linking Khari Crossing and the Galai Gates. His story arc ties directly into the ongoing conflict with Asala,Sekhema of Sekhemas,positioning him as a central figure rather than a side encounter. Unlike optional bosses scattered across the campaign,this fight is unavoidable,and players must face him to progress.

The battle unfolds in a large open arena,giving you plenty of space to reposition and dodge. You’ll need every inch of that space once the fight escalates.Don’t let POE 2 Currency hold you back-MMOexp has you covered.

Fight Progression

Like most major PoE2 bosses,Azmadi fights in two phases:

Phase One (100% → 60% HP):His swings are slower and more clearly telegraphed. This stage is meant for learning his move set.

Phase Two (below 60% HP):When his health drops,Zarokh,the Temporal freezes time and empowers Azmadi. From this point,his attacks become much faster,harder to read,and deadlier.

Azmadi’s Attack Patterns

Azmadi blends melee pressure with spectral magic,chaining his abilities in unpredictable ways. Here’s what to watch for:

1.Sword Dash-A fast lunge forward. Roll to the side as he moves.

2.Single Swing-A baiting strike that punishes early dodges.

3.Multi-Swing Combo-A rapid three-hit melee string that can transition into other moves.

4.Sword Throw-Launches spectral blades in sequence,each following the last’s direction.

5.Spectral Heavy Slash-Multiple illusions appear before he delivers a devastating charged slash.

6.Blink AoE Slash-Teleports repeatedly across the arena,leaving damaging zones.

7.Spectral Sword Dash-Swords spawn around the arena,marking his AoE dash trajectory.

8.Aerial Slam with Clones-Jumps high,creating illusions before slamming down and unleashing fan-shaped shockwaves.

9.Delayed Three-Hit Combo-Sends slash waves forward. The third is delayed to catch hasty dodges.

Strategy Guide

Phase One

Stay calm and observe. This is the safest part of the fight-use it to recognize his tells.

Punish recovery windows. Melee builds should bait swings and strike immediately after.

Kite as ranged. Keep circling and avoid overcommitting damage bursts.

Phase Two

Transition:As Zarokh intervenes,immediately roll away-Azmadi often opens with his Blink AoE Slash.

Spectral Sword Dash:Watch for glowing swords on the ground. Roll sideways at the last second.

Delayed Combo:Dodge the first two slashes,wait half a beat,then roll again for the third.

Aerial Slam:Instead of retreating,move behind his landing spot to avoid the spreading waves.

Sword Throw:Maintain lateral movement until the sequence ends,much like dodging Torvian in Act 4.

The second phase demands strict timing and patience-panic-rolling early is the fastest way to die.

Preparing for the Battle

Azmadi is the type of boss where gear and flask setup directly influence success:

Defensive Flasks:Prioritize armor,evasion,and resistance flasks.

Mobility Gear:Movement speed boots or dash-support modifiers make repositioning safer.

Unique Items:Look for uniques that grant life on hit or mitigate consecutive hits.

Crafted Gear:Tailor resistances to blunt his elemental damage.

If farming is slowing you down,consider acquiring key Path of Exile 2 items through trade. Don’t let currency shortages hold you back-acquire your cheap Path of Exile 2 Currency now at MMOexp and thrive! Proper preparation can mean the difference between learning the fight and being crushed in seconds.

The fight with Prince Azmadi is one of the true skill checks of Path of Exile 2 campaign. He punishes recklessness,punishes sloppy dodges,and refuses to let glass-cannon builds brute force their way through. But with patience,pattern recognition,and the right gear,even his deadliest chains become manageable.

Azmadi isn’t just another roadblock-he’s a duel that teaches players how brutal,yet fair,Path of Exile 2 combat can be.

Diablo 4:Complete Guide to Farming Baneful Hearts

In Diablo 4, Baneful Hearts are an essential item for summoning the Blood Maiden, a Helltide-exclusive boss. This boss not only provides rare loot and crafting materials like Living Steel, but also plays a key role in the Season 9 Boss Ladder. While collecting Baneful Hearts can be challenging, using the right strategies makes farming them faster and more efficient.Your journey to greatness begins here! Purchase Diablo 4 gold from MMOexp now and embark on your path to victory!

Baneful Hearts are consumable items required to summon the Blood Maiden during Helltide events. Defeating her rewards players with valuable loot and Aberrant Cinders, which can be exchanged for Tortured Gifts and power other Helltide mechanics. By farming Baneful Hearts effectively, you create a continuous loop of resources, maximizing your Helltide rewards.

Top Ways to Farm Baneful Hearts

Most methods of obtaining Baneful Hearts revolve around Helltide activities. Here are the most effective ways:

1.Open Tortured Gifts

    Drop Rate:Approximately 15%

    Pity Mechanic:Your chance increases the longer you go without a drop

    Strategy:Prioritize Tortured Gift of Mysteries and weapon/armor chests for better rewards

    Tip:Use Aberrant Cinders earned from Blood Maiden runs to open more chests

    2.Kill Helltide-Specific Enemies

      Helltide Assassins & Hellborne:~1% drop chance

      Both benefit from a pity system, so repeated kills improve your odds over time

      3.Defeat World Bosses During Helltide

        Reward:Guaranteed 3 Baneful Hearts if the boss spawns during an active Helltide

        Tip:Coordinate your run with world boss timers using community tools or official schedules

        4.Complete Helltide Local Events

          Certain events spawn chests that may drop Baneful Hearts

          Best used in areas with multiple event spawns for efficient farming

          5.Helltide Commander Events

            Elite events with guaranteed Baneful Heart drops

            Look for skull icons with glowing borders on your map during Helltides

            6.Hunt Helltide Harbingers

              Mini-bosses with very high drop rates

              Appear in areas where threat levels are high

              Highly efficient for repeated farming if you encounter them often

              Blood Maiden Farming Loop

              One of the most efficient farming strategies is creating a loop around the Blood Maiden:

              Summon and defeat the Blood Maiden to collect loot and Aberrant Cinders

              Exchange Cinders for Tortured Gifts to obtain more Baneful Hearts

              Repeat this cycle for maximum efficiency

              Pro Tip:Bring a pet to automatically collect Aberrant Cinders and save time.

              Best Helltide Zone:Gea Kul (Kehjistan)

              Community feedback identifies Gea Kul as the ideal Helltide zone for Baneful Heart farming:

              Two closely placed world events for fast loops

              Frequent Hellborne, Harbinger, and Commander spawns

              High visibility and dense enemy placement

              Key Events to Target:

              Tornado Event surrounded by cultists

              Summoning Circle with portal cultists

              These events reset quickly, allowing you to loop between zones. High threat buildup during loops also triggers more Harbinger spawns.

              Note:You’ll need to wait for Helltide to rotate into Kehjistan for optimal farming.

              Farming Baneful Hearts in Diablo 4 requires persistence, but it’s far from impossible. Rotating between Tortured Gifts, Blood Maiden encounters, and Gea Kul event loops lets you gather Baneful Hearts and other Helltide resources quickly. Mastering this cycle not only supplies essential materials but also positions you for long-term success in Season 9 Boss Ladder system. With the right approach, farming Baneful Hearts becomes a streamlined and rewarding process rather than a tedious grind.What are you waiting for? MMOexp instant cheap Diablo IV Items delivery will elevate your Diablo IV experience. Play smarter, not harder!

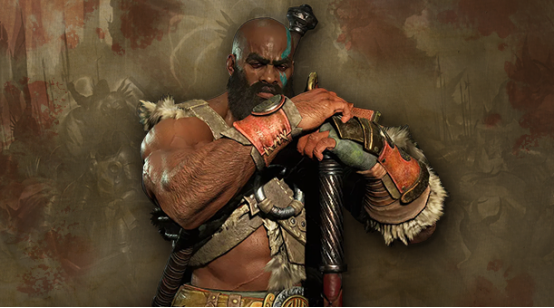
              Diablo 4 Season 9: The Rise of the Lunging Strike Barbarian Build

              Season 9 of Diablo 4, “Sins of the Horadrim,” has brought a treasure trove of new gear, Diablo 4 items, and customization systems for every class. For Barbarian mains, one build has surged in popularity above all others: the Lunging Strike Barbarian.

              Once considered a simple gap-closer skill, Lunging Strike has been transformed into a screen-clearing, cooldown-resetting powerhouse when combined with the right Uniques and Aspects. With Hooves of the Mountain God, Rage of Harrogath, and Paingorger’s Gauntlets, this build is shredding through endgame dungeons, Nightmare tiers, and even pushing Tier 100 content.

              This guide breaks down everything you need to know about mastering the Lunging Strike Barbarian in Season 9.

              Why Lunging Strike Works in Season 9

              The beauty of this build lies in its simplicity: Lunging Strike is your main damage tool from level 2 to the endgame. With the right gear, it evolves from a basic mobility attack into a chain-cleaving, AoE-blasting vortex of steel.

              Core Synergies

              ·Lunging Strike (Battle Variant) – Low Fury cost, high uptime. Triggers Rage of Harrogath cooldown resets.

              ·Hooves of the Mountain God – Transforms Lunging Strike into a cleaving powerhouse, draining Fury but boosting Basic Skill damage.

              ·Paingorger’s Gauntlets – Marks targets with non-Basic skills; Lunging Strike detonates them with echoed damage explosions.

              ·Rage of Harrogath – Cooldown resets on Bleed ticks, fueling endless Ground Stomps, shouts, and Wrath of the Berserker uptime.

              ·Ground Stomp + Aspect of Earthquake – Burst AoE, CC, and additional Earthquake damage.

              The result? A build that never stops swinging, never runs out of cooldowns, and thrives in high-density mob packs.

              Playstyle & Skill Rotation

              To maximize your damage, follow this general rotation:

              1. Wrath of the Berserker → Engage with Unstoppable + Berserking buffs.

              2. Buff Up → Activate Rallying Cry, War Cry, and Challenging Shout for damage, Fury, and survivability.

              3. Spam Lunging Strike → Focus on Paingorger-marked enemies for massive AoE blasts.

              4. Ground Stomp → Trigger Earthquake, reset cooldowns, and reapply CC.

              5. Repeat → Maintain Berserking and cooldown uptime, keeping momentum constant.

              The key is never letting Lunging Strike stop chaining. With cooldown resets and Fury synergies, you’ll always be in motion.

              Skill Progression Guide

              Early Game (Levels 2-15)

              ·Max Lunging Strike first.

              ·Pick up Ground Stomp and Rallying Cry.

              ·Add War Cry and Challenging Shout for defense.

              Mid Game (16-32)

              ·Upgrade Ground Stomp and Rallying Cry.

              ·Unlock Wrath of the Berserker.

              ·Invest in Fury generation and cooldown nodes.

              Endgame (33-72)

              ·Max out passives like Belligerence, Pit Fighter, and Aggressive Resistance.

              ·Prioritize Ultimate Skill Cooldown Reduction.

              ·Unlock Unconstrained Key Passive for near-permanent Berserking.

              Best Gear & Uniques

              If you want to push this build into true endgame territory, you’ll need the following key pieces. (Tip: You need mats and buy Diablo 4 items.)

              1. Hooves of the Mountain God – Core item, turns Basics into cleaving monsters.

              2. Rage of Harrogath – CDR powerhouse that keeps your skills cycling.

              3. Paingorger’s Gauntlets – Marks + Echo mechanic for explosive AoE.

              4. Harlequin Crest – +4 skills and defenses.

              5. Tibault’s Will – Fury generation and Unstoppable synergy.

              6. Ramaladni’s Magnum Opus – Boosts damage from Fury pool management.

              7. The Grandfather – Huge Crit Damage scaling.

              8. Shard of Verathiel – +150% Basic Skill damage.

              9. Ring of Starless Skies – Long fight consistency with reduced costs and scaling damage.

              Legendary Aspects

              ·Aspect of the Moonrise – Ramping Basic Skill damage and speed.

              ·Aspect of Earthquake – Core synergy with Ground Stomp.

              ·Aspect of Adaptability – Bonus Fury and scaling damage.

              Spellcrafting & Runewords

              ·Catalyst: Astral Pillar – Applies Vulnerable and waves of damage.

              ·Infusion: Smoldering Ember – Converts to Fire + DoT synergy.

              ·Arcana: Invigorating Helix (healing/fortify), Fractured Core (DR removal).

              Runewords:

              ·CirThul – Vulnerable uptime with Frost Nova.

              ·ZanXan-Ahu – Guaranteed Crits on next hit.

              Final Thoughts

              The Lunging Strike Barbarian has gone from being a leveling skill to one of the strongest, most reliable endgame builds in Diablo 4: Season 9. With its unmatched speed, AoE control, and synergy-driven playstyle, it stands toe-to-toe with the meta while offering something refreshingly different.

              If you’re a Barbarian player looking for a fast-paced, high-skill expression build, Lunging Strike is the answer. Gear up, stack your cooldowns, and leap into the fray – because this build never stops swinging.

              Diablo 4 Season 9: Most Overpowered Builds Ranked (Sins of the Horadrim)

              Season 9 of Diablo 4, titled Sins of the Horadrim, unleashes a wave of devastatingly powerful builds, each tailored to take on high-tier Nightmare Dungeons, PvP brawls, and endgame boss fights with ease. With new Horadric systems, class synergies, and the introduction of the Spiritborn class, players have more tools than ever to create unstoppable loadouts.Get your Diablo 4 gold today and unlock the ultimate gaming experience. Gear up, trade, and conquer with ease!

              From classic fan-favorites to fresh Spiritborn combos, here are the top overpowered builds in Season 9—ranked by sheer power, versatility, and fun factor.

              1.Poison Trap Rogue – The DoT Assassin

                Ideal For: Endgame PvE, High Nightmare Dungeons, Crowd Control
                Top Aspects: Exploiter, Blast-Trapper, Bladedancer
                Best Gear: Harlequin Crest, Doombringer, Andariel’s Visage
                Best Gems: Emeralds (Crit), Skulls (Regen)

                Poison Trap is lethal this season, combining deadly traps with Rapid Fire for unmatched clean-up. It thrives on crit stacking and crowd control, easily scaling into late-game content with minimal risk.

                2.Whirlwind Barbarian – Eternal Spin Engine

                  Ideal For: Leveling, AoE Clearing, Speed Farming
                  Top Aspects: Dust Devils, Relentless Berserker, Fierce Winds
                  Best Gear: Rage of Harrogath, Yen Blessing
                  Best Gems: Rubies (Armor), Sapphires (Weapon)

                  The iconic “spin to win” playstyle returns with stronger mobility and Fury regeneration. Whirlwind Barbarians effortlessly clear mobs while maintaining near-constant uptime on their skills.

                  3.Quill Volley Spiritborn – Precision Ranged Destruction

                    Ideal For: AoE Leveling, New Players, Endgame Bosses
                    Top Aspects: Plains Power, Rebounding
                    Best Gear: Rod of Kepeleke, Loyalty’s Mantle
                    Best Gems: Amethyst (Barrier), Topaz (Skill Boost)

                    A standout newcomer, this build mixes rapid AoE attacks with summoned Jaguars for extra pressure. It’s flexible, visually satisfying, and excels in dungeon-heavy content.

                    4.Hydra Sorcerer – Burn Them All

                      Ideal For: Mid-Late PvE, Fire Builds
                      Top Aspects: Engulfing Flames, Heretic, Concentration
                      Best Gear: Staff of Endless Rage, X’Fal Corroded Signet
                      Best Gems: Rubies (Resist), Skulls (Regen)

                      This low-APM, high-output sorcerer focuses on Firewall and Hydra synergy. It dominates mid to high-end content with AoE burn damage while staying safe at range.

                      5.Pulverize Werebear Druid – Melee Juggernaut

                        Ideal For: Bossing, PvP, Group Play
                        Top Aspects: Shockwave, Ursine Horror, Changeling Debt
                        Best Gear: Godslayer Crown, Wildheart Hunger
                        Best Gems: Rubies (Flat Damage), Diamonds (Ultimate Boost)

                        The Werebear Pulverize remains one of the tankiest, hardest-hitting melee setups in the game. Its burst and sustain make it a top choice for all types of encounters.

                        6.Twisting Blades Rogue – Shadow Assassin

                          Ideal For: PvP, Fast PvE, Burst Damage
                          Top Aspects: Ghostwalker, Disobedience, Accelerating
                          Best Gear: Eyes in the Dark, Cowl of the Nameless
                          Best Gems: Diamonds/Topaz (Offense), Skulls (Healing)

                          Stealthy and deadly, Twisting Blades excels at eliminating targets quickly. Its high mobility and cooldown resets make it perfect for agile players who like to hit hard and vanish.

                          7.Bone Spear Necromancer – Precision Piercing

                            Ideal For: Endgame PvE, Bossing, Efficient Farming
                            Top Aspects: Torment, Metamorphosis, Hardened Bones
                            Best Gear: Deathless Visage, Lidless Wall
                            Best Gems: Emeralds (Crit), Rubies (Damage)

                            Bone Spear delivers surgical strikes that can decimate entire packs or bosses. With the Ossified Essence setup, this build scales brutally with proper resource management and affix tuning.

                            8.Chain Lightning Sorcerer – Arc Lightning Mayhem

                              Ideal For: AoE Control, Crowd Stun Builds
                              Top Aspects: Overwhelming Currents, Stable, Unbroken Tether
                              Best Gear: Raiment of the Infinite, Frostburn
                              Best Gems: Emeralds (Crit), Skulls (Sustain)

                              This electrifying build thrives on chaining stuns and dealing fast multi-target damage. It’s flashy, responsive, and perfect for those who love control-based spellcasting.

                              9.Corpse Explosion Necromancer – Undead Bomber

                                Ideal For: Explosive PvE, Dungeon Clears
                                Top Aspects: Blighted, Aphotic, Frenzied Dead
                                Best Gear: Temerity, Greaves of the Empty Tomb
                                Best Gems: Rubies (Overpower), Skulls (Regen)

                                A longtime fan favorite, Corpse Explosion is back with even more synergy—especially with shadow damage and minions. Turn every enemy into an explosive opportunity.buy Diablo 4 Items at MMOexp and enhance your gameplay with instant delivery and top-notch service.

                                Season 9 Sins of the Horadrim update is the most diverse yet, thanks to Horadric affixes, Spiritborn innovations, and revamped Nightmare Dungeons. Whether you prefer raining fire, commanding beasts, or detonating corpses, there’s a game-breaking build ready for you.

                                OSRS Flame Cape:Full Breakdown & Guide

                                The Flame Cape is a prestigious melee cloak in Old School RuneScape, known for its fierce design and powerful combat stats. Awarded upon completion of the TzHaar Fight Cave, the cape is a symbol of both strength and perseverance, earned only by those who conquer one of the most grueling solo challenges in the game. As the second-best melee cape in OSRS—just behind the Infernal Cape—it remains a major goal for combat-focused players.

                                How to Obtain the Flame Cape

                                To unlock the Flame Cape, players must complete the TzHaar Fight Cave by defeating TzTok-Jad, the final boss. This encounter pushes players to the limit, requiring:

                                Precise prayer switching

                                Knowledge of enemy wave mechanics

                                Endurance through over 60 waves of escalating difficulty

                                Victory over Jad not only rewards the Flame Cape but also marks a significant PvM (Player vs Monster) milestone in any adventurer’s journey.

                                Stat Bonuses and Combat Performance

                                The Flame Cape is a melee-oriented item with the following benefits:

                                +4 Strength Bonus: Boosts melee damage output significantly.

                                +2 Melee Attack & Defence Bonuses: Increases accuracy and protection in close combat.

                                Light Defensive Utility: While primarily melee-based, it offers small bonuses to other combat defenses.

                                These stats make it a strong pick for PvM, Slayer, and even some PvP encounters for players who haven’t yet earned the Infernal Cape.

                                Key Features and Utility

                                Symbol of Accomplishment

                                More than just gear, the Flame Cape serves as proof of your success against TzTok-Jad. Wearing it proudly signals your skill and tenacity to others in the OSRS community.

                                Storage and Display

                                Players can:

                                Store it on the Cloak Rack in the player-owned house for convenience.

                                Display it in the Achievement Gallery as a tribute to their victory.

                                Trade Options & Pet Unlock

                                Sell for Tokkul: Exchange the cape for 8,000 Tokkul via TzHaar-Mej-Jal.

                                Pet Trade: Sacrifice the cape to attempt unlocking Tzrek-Jad, a miniature version of Jad that follows the player. This trade-off is popular among pet hunters and collectors.Don’t let your dreams in OSRS wait – buy your OSRS gold now at RSgoldfast and take your game to the next level!

                                Max Cape Combination

                                If you’ve achieved level 99 in all skills, you can combine the Flame Cape with your Max Cape to create the Flame Max Cape. This hybrid cape offers the aesthetics and power of both, making it the ultimate cosmetic and functional flex for maxed players.

                                Wintertodt Compatibility

                                Though designed for combat, the Flame Cape has a niche utility during the Wintertodt boss activity. It qualifies as warm clothing, reducing cold damage and making it viable for Firemaking training without sacrificing style.Level up your game with instant cheap OSRS gold from RSgoldfast. Experience unparalleled quality and customer support – your adventure starts here!

                                The Flame Cape remains one of the most iconic rewards in OSRS. With powerful melee bonuses, strong versatility, and a bold visual presence, it represents both utility and prestige. Whether you’re working your way toward the Infernal Cape or simply seeking a worthy challenge, the Flame Cape offers both immediate performance value and long-term bragging rights.It’s not just a cape—it’s a mark of mastery.